3.jpg)
Cavity insulation: This type of insulation gets its name from being used in the “cavities” between a building’s framing and studs. It commonly involves fiberglass batts, which look like pink or yellow fluff strips, placed between wooden posts. These batts are cost-effective but won’t provide perfect insulation. The fluffy material isn’t airtight, so it won’t keep all the warm or cool air in.
Published December 17, 2024
Insulate Your Home the Right Way: The Do’s and Don’ts of How To Stay Warm By Realtor.com


Insulation isn’t a home’s most glamorous feature—it’s tucked away behind walls, after all—but it quietly becomes the MVP of your winter survival strategy when the temperature drops. By keeping the warm air in and the cold air out, insulation helps maintain a comfortable interior temperature while keeping those heating bills in check.
But like many things in a home, insulation tends to go unnoticed—until it’s not doing its job. If your house doesn’t have enough of it, you could layer up with blankets or dial up the thermostat beyond your budget. Worse, improperly installed insulation can create even bigger headaches, like moisture buildup inside your walls. And where there’s moisture, there’s often mold—along with potential damage to the very structure of your home.
If you’ve noticed a drafty chill creeping into your space, it might be time to assess whether your insulation needs an upgrade. Just be sure to follow a few key do’s and don’ts.
Do: Know what climate you live in
The first step is learning what level of insulation will be best for your home—and your local weather. (After all, homeowners in sunny Southern California don’t need, or necessarily want, the kind of insulation found inside homes in icy Alaska.)
Insulation is measured by its thermal resistance, or R-value, which measures the material’s type, thickness, and density. Simply put, the higher the R-value, the better the climate control.
The Department of Energy recommends different insulation levels, numbered 1 through 8, based on region. The hot, humid southern tip of Florida is a “Zone 1,” while the cold, northern half of Minnesota is a “Zone 7.”
A “Zone 1” home might require R-13 for an uninsulated, wood-frame wall, while R-20 is recommended for the same wall in a “Zone 7 or 8” home.
Don’t: Think insulation is one size fits all
Don’t just grab the first insulation roll on sale and call it a day. What works in one region—or even one part of your house—may not be ideal for another. Using the wrong type or thickness could lead to inefficiencies or problems like moisture buildup.
The easiest way to determine your home’s R-value needs is to check your local building codes or consult a professional insulation contractor who knows your area’s specifics.
“Knowing the limitations of your space is key,” says Mark Scott, president of MARK IV Builders, a design/build residential remodeling firm based in the Washington, DC, area.
Do: Understand different areas need different levels of insulation
So, you’ve done your homework. You’ve figured out you’re in a Zone 4 area, know the R-value you need, and are ready to tackle your insulation project. But before you grab your keys and head to the store, here’s something to remember: Not all parts of your home are created equal regarding insulation needs.
Like climate zones dictate different R-values, the various parts of your home—floors, walls, and attic spaces—each have unique requirements. For instance, while your attic might need higher R-values to combat rising heat, your walls or crawl space might not require quite as much.
Johns Manville, a manufacturer of insulation and commercial roofing, explains: “Typical recommendations for exterior walls are R-13 to R-23, while R-30, R-38 and R-49 are common for ceilings and attic spaces.”
Do: Know the types of insulation
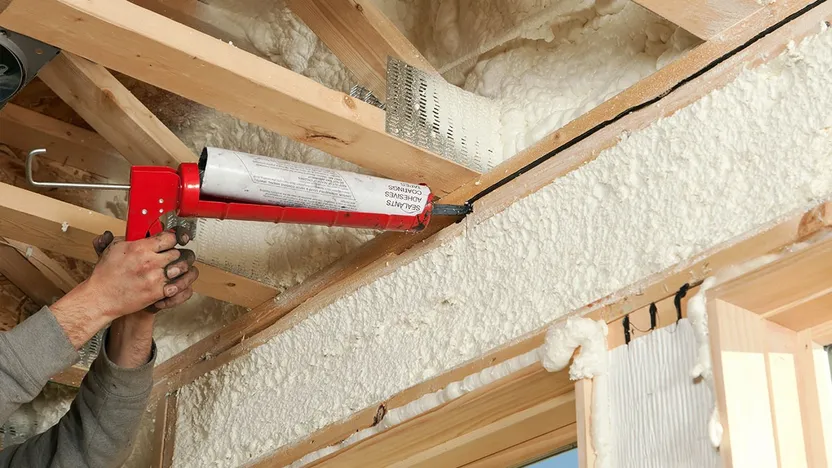
Once you’ve determined your R-value needs, you must choose the best insulation for your home. Different insulation materials (fiber, foam boards, and reflective foils) and installation techniques are available. There are two ways to insulate a building: cavity insulation and continuous insulation.
Spray foam insulation is often preferred because it is airtight, but even this version won’t bring perfect results, as air can still seep out through the wood—called “thermal bridging.”
Continuous insulation: As the name suggests, this form of insulation involves covering the entire building with insulating material—usually foam boards onto the exterior side of walls—rather than placing the material between the wood.
This type of insulation can give homeowners a nearly 100% insulated home, which means low energy bills. It also come with a lower risk for moisture problems.
While it may seem like there are many insulation options, know that you likely won’t be able to take your pick. Once again, the proper choice will depend on your climate, but it will also probably be influenced by your budget and building. Your home may already have some insulation; the best route may be adding to what’s already there.
Do: DIY certain kinds of insulation
Some handy homeowners may want to install their insulation themselves. After all, it could save money, and there are plenty of helpful guides online—like this one from Lowe’s.
The Insulation Institute says that DIY could be a good option if the wall is open and accessible (like an unfinished attic or basement). They also note that insulation material is an important factor, saying that batts or rolls “are typically installed by homeowners.”
Don’t: Hesitate to hire a professional
While DIY can be a good option for some, many types of insulation require professional installation. Even if your chosen type doesn’t require a professional, many homebuyers will splurge to ensure their insulation is done right.
If you go this route, the Department of Energy recommends gathering several quotes from different contractors. They also recommend asking contractors about air-sealing services and their experience with whatever insulation product you’re interested in, as faulty installation can affect performance.
"Call Eli Torres at (832) 430-2107, for your home buying and selling needs."
Source: www.realtor.com


